
")
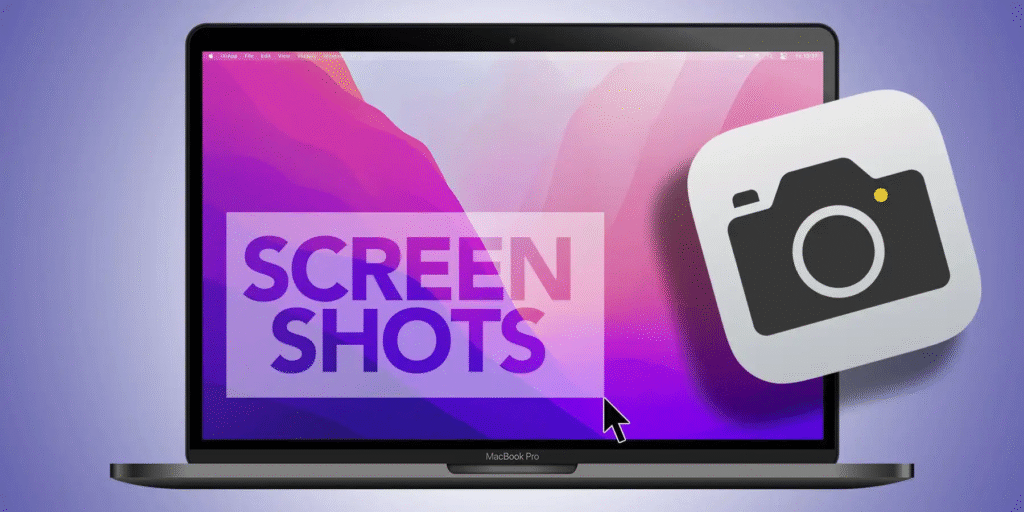
Taking a screenshot on a Mac might sound like something only tech experts can do, but it’s actually super simple. Whether you want to capture your entire screen, a part of it, or a specific window, macOS gives you the tools to do it quickly and easily—even a 10-year-old can master it in minutes!
What Is a Screenshot auf dem Mac?
A screenshot auf dem Mac (screenshot on a Mac) is simply a digital photo of what you see on your computer screen. Think of it like using a camera to snap a picture, but instead of pointing the camera at your Mac, the computer takes the image itself. Screenshots are useful when you want to save something, share information, or explain a problem you’re having.
In today’s digital world, screenshots are everywhere. From saving receipts and online recipes to sharing funny social media moments or reporting tech issues, screenshots are one of the easiest tools you can use. If you’re using macOS in the United States and searching for how to capture your screen, the keyword “screenshot auf dem Mac” is gaining popularity due to growing multilingual user bases.
How to Take a Full Screenshot on Mac
When you want to capture everything that’s on your screen—the full view—you can use macOS’s built-in keyboard shortcut. It’s fast and doesn’t need any special software. Taking a full-screen screenshot can help in many scenarios: maybe you’re making a tutorial, or you want to save an entire webpage exactly as it looks on your screen.
All you need to do is press a few keys together, and macOS instantly takes a picture of the entire display. No need to download third-party apps or use complicated tools. This feature is built right into your Mac.
Use Command + Shift + 3
The most common way to take a screenshot auf dem Mac is to use the keyboard shortcut Command + Shift + 3. This shortcut captures the entire screen, including everything visible—your open apps, the menu bar, the dock, and even notifications if they are showing at that moment.
This is ideal when you want to share a complete view of what you are working on or when you are troubleshooting and need to show tech support everything you see. It’s super easy and super fast—just press those three keys at the same time.
Where It Gets Saved
Once you press Command + Shift + 3, the screenshot is automatically saved to your desktop. You’ll see a file named something like Screenshot 2025-07-28 at 10.30.00 AM.png. The name will include the date and time, making it easy to find later.
If you have macOS Mojave or later, you’ll even see a small preview pop up in the bottom-right corner. From there, you can click on it to make quick edits or drag it into an email or message without saving it first.
How to Take a Part of the Screen Only
Sometimes, you don’t want to capture the full screen—just a specific part of it. Maybe it’s a small section of a webpage, a chart in a document, or a photo in a presentation. macOS gives you the ability to select exactly what you want to screenshot, and leave out the rest.
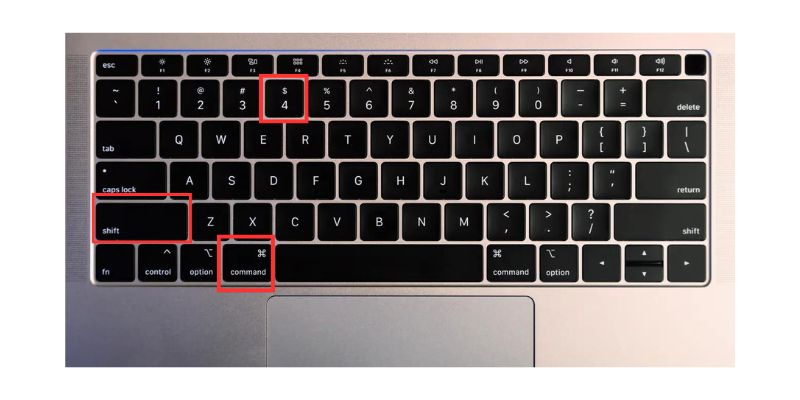
Try Command + Shift + 4
Use Command + Shift + 4 for this. When you press these keys, your cursor turns into a little crosshair. You can click and drag to select the part of the screen you want to capture. As soon as you let go of the mouse or trackpad, your Mac takes the screenshot and saves it to your desktop.
This is incredibly helpful for keeping screenshots clean and focused. No one wants to see extra stuff when you’re just trying to share one specific area!
Cancel If You Made a Mistake
We all make mistakes, especially when we’re trying something new. Let’s say you pressed the screenshot shortcut but accidentally selected the wrong area. No problem! If you’re using Command + Shift + 4 and haven’t released your click yet, just press the Escape (Esc) key on your keyboard. This cancels the screenshot process right away.
Your cursor goes back to normal, and nothing gets saved. You can try again without worrying about filling your desktop with mistakes. This little trick is super useful, especially if your hands slip or your mouse moves unexpectedly.
How to Take a Screenshot of a Window
If you only want to capture one specific window—like Safari, Finder, or a document in Pages—there’s a simple way to do it. Press Command + Shift + 4, then tap the Spacebar. Your cursor turns into a little camera icon.
Now, move the camera icon over the window you want to capture. The selected window will turn blue. Just click, and your Mac saves the screenshot of only that window to your desktop. The best part? It even includes a nice shadow around the window to make it look more polished and professional.
This is especially useful when you’re creating a presentation, tutorial, or blog post and want clean, focused images of your apps or work.
Using the Screenshot Tool on Mac
macOS also comes with a built-in Screenshot app that offers more control over how and what you capture. Press Command + Shift + 5 to open the screenshot toolbar. This toolbar appears at the bottom of your screen and lets you:
- Capture the entire screen
- Capture a selected window
- Capture a selected portion
- Record the entire screen (video)
- Record a selected portion (video)
You also get options to choose where to save your screenshot, whether to set a timer, and if you want to show the mouse pointer in the screenshot. This is great for people who want more flexibility.
Where Do Screenshots Go on Mac?
By default, screenshots go straight to your desktop. But with the Screenshot tool, you can choose to save them elsewhere—like your Documents folder, Downloads folder, or even copy them to the clipboard.
To change the location, click Options in the screenshot toolbar. You’ll see a list of common save destinations. This is especially helpful if you take a lot of screenshots and want to keep your desktop clean.
How to Edit a Screenshot Right Away
After taking a screenshot, especially on newer versions of macOS, you’ll see a little thumbnail preview pop up in the bottom-right corner of your screen. Click on it before it disappears, and you’ll open a simple editing window.
Here, you can crop, rotate, draw, and add text. This is perfect when you want to make quick notes or highlight something important before sending the screenshot.
Use Markup Tool
The Markup Tool is built right into macOS. It gives you options to add arrows, shapes, lines, text, and even your signature to your screenshots. This makes your images more informative and easier to understand. For example, if you’re sending instructions to someone, you can circle the important part or write “Click here” with an arrow.
No need to open Photoshop or any other complicated app—the Markup Tool gives you everything you need.
How to Copy a Screenshot Without Saving
Sometimes you don’t want to save a screenshot—you just want to copy it and paste it into a message or document right away. Easy!
Just add the Control key when you use a screenshot shortcut. For example:
- Press Command + Control + Shift + 3 to copy the full screen
- Press Command + Control + Shift + 4 to copy a selected portion
Now, you can go to an email, document, or chat, and press Command + V to paste the screenshot without having saved it as a file. This saves time and keeps your desktop from getting cluttered with too many files.
The Bottom Line
Taking a screenshot auf dem Mac is easier than you might think. Whether you’re a kid learning to use a Mac for school, a parent sharing a recipe, or a professional capturing work for a presentation, macOS makes it incredibly user-friendly. From full-screen captures to partial screenshots and even window-only shots, you’ve got all the tools you need at your fingertips.
Use shortcuts like Command + Shift + 3 for full-screen images, or Command + Shift + 4 for specific areas. Want to get fancy? Try Command + Shift + 5 for video capture and advanced settings. Don’t forget about the Markup Tool to highlight and edit screenshots fast.